+ plugin을 정상적으로 설치를 하고 SDCC 프로젝트를 생성을 하려고 하면 'internal' 에러가 혹은 java.nullpoint 어쩌고 에러가 발생한다. 이는 해당 plugin이 x86용으로 개발되었기 때문에 x64 환경에서 실행시에 오류가 발생하나보다 이와 관련된 몇몇 블로그에서 해결했다고 하던데 그 방법으로는 잘 안되었고, 위 링크에서 해결했다.
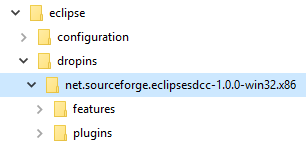
+ 첨부된 'net.sourceforge.eclipsesdcc-1.0.0-win32.x86_for_x64.zip' 압축을 풀고 이클립스의 실행 경로의 'dropins' 폴더에 붙여 넣는다.
+ 그리고 이클립스를 재 시작하면 SDCC용 프로젝트를 만들수 있다.
5. SDCC 환경 설정하기.
+ Windows -> Preference -> C/C++ -> Build -> Environment로 이동하여 오른쪽 항목에서 Add를 클릭하고 아래처럼 입력
+ C/C++ General -> Preprocessor Include Paths, Macros etc로 이동하고 오른쪽 항목에서 'Entries' 탭의 Languages 항목에서 GNU C를 선택
++ 오른쪽 Setting Entries에서 CDT User Setting Entries를 선택하고 Add 버튼을 클릭하여 아래 항목을 추가
+++ 'Preprocessor Macro' 항목을 선택하고 Name에 '__SDCC', Value에 '1'을 입력하고 OK 클릭
++ 같은 방법으로 아래처럼 하나 더 추가
+++ 'Preprocessor Macro' 항목을 선택하고 Name에 'SDCC', Value에 '1'을 입력하고 OK 클릭
+ Apply and Close -> Finish를 클릭해서 프로젝트 생성을 완료한다.
Eclipse is a popular JAVA IDE, with the aid of Eclipse CDT plugin, it becomes a good IDE for C/C++ development. Eclipse CDT offers much more functions and flexibility than conventional embedded-system IDEs (Keil uVersion, IAR, ST Vistual Develop, e.t.c...), such as find usage, refactor, code navigation, version control, e.t.c...
Pre-requests
This post will guide you to setup a SDCC environment with Eclipse CDT. (The following method only applys to Windows x86/x64, however, setting up Eclipse on Linux is similar and this article could be used as a reference).
Install Eclipse CDT (Necessary for C/C++ development) after install eclipse, launch it and click the "Help" menu, then "Install New Software". Put http://download.eclipse.org/tools/cdt/releases/9.3/ in the textbox next to "Work with:". Hit enter and wait for freshing. CDT is massive, in this case we only need few components, so if you want to reduce disk usage, then only check CDT Main Features->C/C++ Development Tools. Restart Eclipse after CDT installation.
Unzip SDCC and MYSY to any folder, e.g. D:\Software\Develop\sdcc\bin and D:\Software\Develop\msys\bin. In Eclipse, go to "Windows" -> "Preference", then on left hand side, navigate through "C/C++ -> Build -> Environment", Add a new environment variable called PATH, its value should be SDCC path plus MSYS path, e.g.: D:\Software\Develop\sdcc\bin; D:\Software\Develop\msys\bin
Unzip Eclipse SDCC plugin to the dropins folder under Eclipse install directory. After this, restart Eclipse, environment setup is complete.
Create Your First Project
Launch eclipse, go to "File -> New -> Other", choose "C Project" and select Others -> MCS51 family (SDCC) for "Project Type", then click "Finish" to close the dialog.
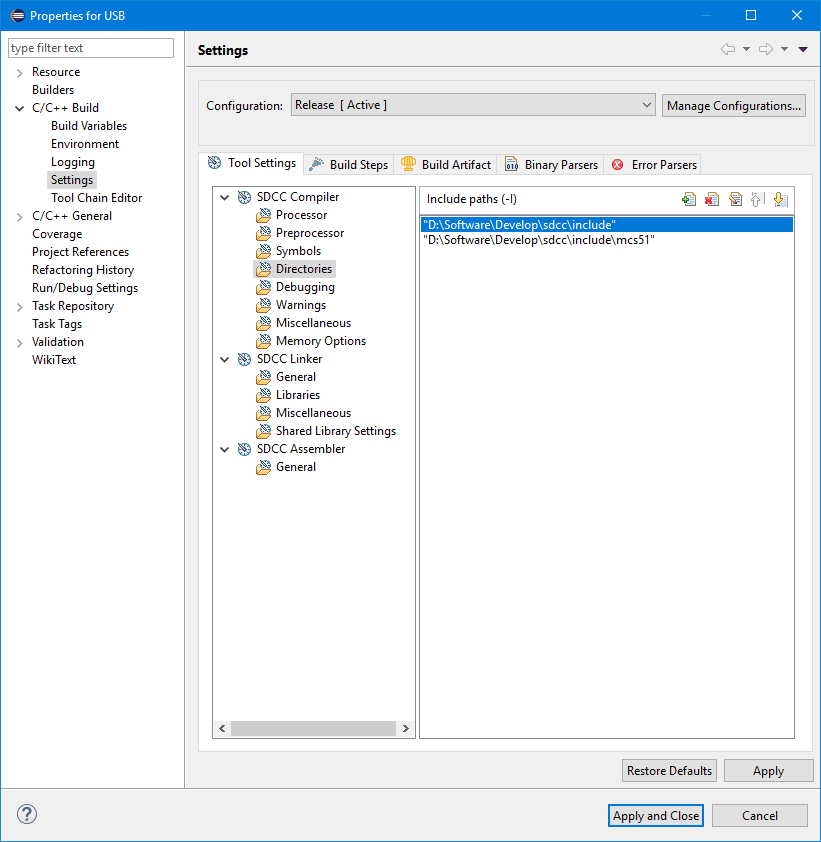
In "Project Explorer", right click the project and choose "Properties", click through "C/C++ Build -> Settings"
In tab "Tool Settings", in the treeview, navigate to "SDCC Compiler -> Directories", then hit the + button, add <yourpath>\sdcc\include. You may also add <yourpath>\sdcc\include\mcs51to include headers for 8051 processors.
Go to tab "Build Steps", type packihx ${ProjName}.ihx > ${ProjName}.hex & makebin -p ${ProjName}.ihx ${ProjName}.bin for Post-build steps command, this tells SDCC to create .hex file and .bin file, which is required for programming the microcontroller.
Go to "C/C++ General -> Preprocessor Include Paths, Macros etc.", In tab "Entries", choose "GNU C", select "CDT User Setting Entries", then hit the "Add" button. Click the combobox on the left-top corner of the window and choose "Preprocessor Macro", in field "Name", type __SDCC and put 1 for its value. Repeat same procedure for macro SDCC. This gives you better experience when you navigating through the source code.
Click "Apply and Close", happy coding!
What kind of patches have been done to Eclipse SDCC to make it work:
You don't need to perform any of the following, my zip file already contain these patches.
The original Eclipse SDCC plugin is slightly outdated and it might not work on Latest Eclipse or Windows x64.
Download the zip file and extract it.
Copy net.sourceforge.eclipsesdcc-1.0.0-win32.x86\plugins\net.sourceforge.eclipsesdcc.win32_1.0.0\os to dropins\net.sourceforge.eclipsesdcc-1.0.0-win32.x86\plugins\net.sourceforge.eclipsesdcc_1.0.0\
Replace dropins\net.sourceforge.eclipsesdcc-1.0.0-win32.x86\plugins\net.sourceforge.eclipsesdcc_1.0.0\os\win32\x86\sh.exe with <somewhere>\msys\bin\sh.exe
Copy everything inside D:\Software\eclipse\dropins\net.sourceforge.eclipsesdcc-1.0.0-win32.x86\plugins\net.sourceforge.eclipsesdcc_1.0.0\os\win32\x86 to D:\Software\eclipse\dropins\net.sourceforge.eclipsesdcc-1.0.0-win32.x86\plugins\net.sourceforge.eclipsesdcc_1.0.0\os\win32 so that it works on 64-bit systems.
8051용 무료 Compiler인 SDCC를 Eclipse IDE와 함께 사용하는 방법을 기술한다. 전체적인 과정은 아래와 같다. 1. SDCC 설치. 2. JAVA Runtime Environment(JRE) 설치. 3. C/C++ Eclipse 설치. 4. SDCC Plug-in 설치. 5. 예제 Compile and Run.
Download 사이트에서 자신의 OS와 CPU type에 맞는 SDCC version을 download 받는다.
노트북에는 Windows8.1이 설치되어 있고, CPU는 32-bit이므로, "sdcc-3.5.0-setup.exe"를 download받는다.
sdcc-3.5.0-setup.exe를 실행해서 SDCC Compiler를 설치한다. "Next"를 클릭한다. "I Agree"를 클릭한다. "Next"를 클릭한다. "Next"를 클릭한다. SDCC 설치 폴더를 선택하고, "Next"를 클릭한다. 설치 과정을 진행한다. 설치한 SDCC 경로를 Path 변수에 추가하기 위해서 "Next"를 클릭한다. "Finish"를 클릭해서 설치를 완료한다. SDCC가 정상적으로 설치되었는지 확인하기 위해서 "sdcc -v"를 실행해 본다.
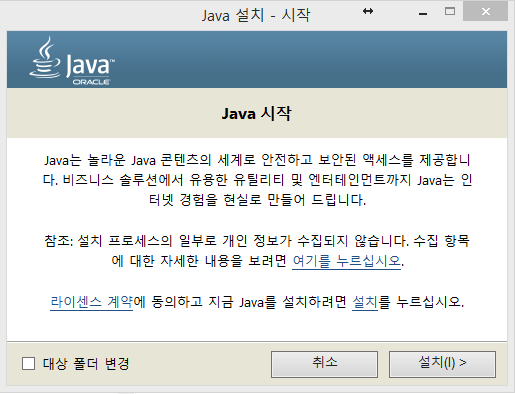
2. JRE 설치. Eclipse는 JAVA로 구현되어 있기 때문에 JRE가 설치되어야만 Eclipse를 실행할 수 있다. http://www.java.com/ko/ 사이트에서 최신 JRE를 Download받는다. 현재 가장 최신 version인 8.60을 설치한다. "설치"를 클릭한다.
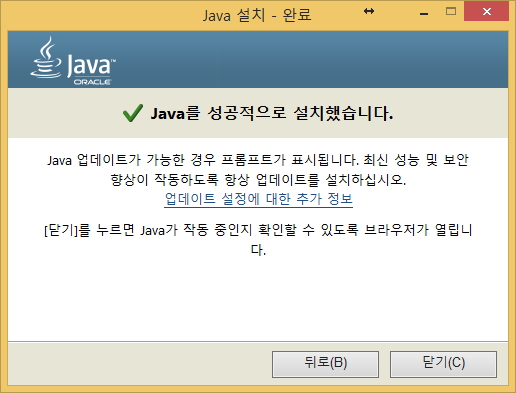
설치가 완료되면 "JAVA 버전 확인" 화면이 나타난다.
3. Eclipse 설치. Eclipse는 설치라기 보다는 복사하는 것과 같다. 따라서 폴더의 경로를 사용자가 기술해야만 한다. 요즘은 설치를 지원하는 것 같다. https://www.eclipse.org/downloads/download.php?file=/oomph/epp/mars/R1a/eclipse-inst-win32.exe 사이트에서 "eclipse-inst-win32.exe"파일을 download받는다. "eclipse-inst-win32.exe"를 실행한다. Eclipse에서는 다양한 개발 환경에 대한 IDE를 지원한다. SDCC를 지원하기 위해서 Eclipse IDE for C/C++ Developers를 선택한다. 설치 폴더를 확인하고, "INSTALL"를 클릭한다. Licenses에 동의하고, Install을 진행한다. 설치가 완료되면 Eclipse Launcher화면으로 전환된다. workspace를 확인하고, Eclipse가 정상적으로 실행되는지 확인한다.
 mingw-get-setup.zip
 windows_SDCC_eclipse.pdf