다운 받고 이미지의 압축을 해제한다.
sudo apt-get install gddrescue xz-utils
unxz ubuntu-mate-16.04.2-desktop-armhf-raspberry-pi.img.xz
이제 fdisk로 이미지의 사이즈 및 시작블럭의 위치를 알아야 한다.
fdisk -l ubuntu-mate-16.04.2-desktop-armhf-raspberry-pi.img
erato@ubuntu16-04:~/src/toolchains/raspberry$ fdisk -l ubuntu-mate-16.04.2-desktop-armhf-raspberry-pi.img
Disk ubuntu-mate-16.04.2-desktop-armhf-raspberry-pi.img: 4.7 GiB, 5000000000 bytes, 9765625 sectors
Units: sectors of 1 * 512 = 512 bytes
Sector size (logical/physical): 512 bytes / 512 bytes
I/O size (minimum/optimal): 512 bytes / 512 bytes
Disklabel type: dos
Disk identifier: 0x1d8c09f0

Device                                              Boot  Start     End Sectors  Size Id Type
ubuntu-mate-16.04.2-desktop-armhf-raspberry-pi.img1        2048  131071  129024   63M  c W95 FAT
ubuntu-mate-16.04.2-desktop-armhf-raspberry-pi.img2      131072 9764863 9633792  4.6G 83 Linux
위와 같이 sector size와 start block의 위치를 가지고 아래와 같이 mount 한다.
Sector size: 512 bytes
Start block for img2: 137216
Note: Don’t use my sector size and start block numbers as yours might be different.
Now we mount it using the following generic command:
sudo mount raspbian.img -o loop,offset=$(( Sector size * Start block for img2)) Destination
So for me it looks like this:
sudo mount raspbian.img -o loop,offset=$(( 512 * 137216)) /mnt/rasp-pi-rootfs/
이제 아래와 같이 sysroot로 변환하기 위한 툴을 받는다.
$ wget https://raw.githubusercontent.com/riscv/riscv-poky/master/scripts/sysroot-relativelinks.py
$ chmod a+x sysroot-relativelinks.py
앞서 마운트한 이미지를 리빌드한다.
$ sudo ./sysroot-relativelinks.py /mnt/rasp-pi-rootfs
이제 /mnt/rasp-pi-rootfs를 sysroot로 사용하면 된다.
파이팅!!
 sysroot-relativelinks.py
참고로 toolchain은 여기서 받으면 된다.
https://releases.linaro.org/components/toolchain/binaries/5.4-2017.01/arm-linux-gnueabihf/
추가로 opencv를 빌드하가 아래와 같은 에러 메시지가 출력된다면...
opencv libopencv_core.so: undefined reference to `dlclose@GLIBC_2.4'
라즈베리파이의 sysroot로 지정된 /lib 폴더에 해당 라이브러리가 없어서 그렇다.
/sysroot/lib/libdl.so.2가 있어야 하지만
/sysroot/lib/arm-linux-gnueabihf/libdl-2.23.so와
/sysroot/lib/arm-linux-gnueabihf/libdl.so.2 심볼릭링크가 존재한다.
결국 이녀석을 /sysroot/lib로 복사해야 한다.
cp /sysroot/lib/arm-linux-gnueabihf/libdl-2.23.so /sysroot/lib/arm-linux-gnueabihf/libdl.so.2
그리고 librt.so도 필요할 것이다.
cp /sysroot/lib/arm-linux-gnueabihf/librt-2.23.so /sysroot/lib/arm-linux-gnueabihf/librt.so.1
다시 빌드하면 잘 될것이다.
=======================================================================
[출처]: https://medium.com/@amirmann/how-to-cross-compile-qt-for-raspberry-pi-3-on-linux-ubuntu-for-beginners-75acf2a078c
How to cross compile QT for Raspberry Pi 3 on Linux (Ubuntu) for Beginners!
Before we start the step by step of how to cross compile QT for Raspberry Pi on linux, let’s discuss some of the basic topics.
Why Raspberry Pi?
Embedded devices are getting more and more mainstream. Every day we see new devices having a linux inside of them . From thermostat to your toaster oven, fridge, etc. The Raspberry Pi3 is affordable, reliable and fast.
Why QT?
I would love to talk for hours on how much I love QT. When it comes to writing GUI applications, there no tool more useful than QT. It’s not just be400cause its typical GUI tools, QT team has taken C++ to a whole new level. You code in C++ but you don’t have to deal with Visual Studio and everything that C++ sucks in. Also when it comes to running your GUI on Raspberry Pi, nothing works better than QT. I tried C# for weeks before landing on QT. I worked a lot with the serial communication capabilities of QT, sockets, and networking a lot more than GUI tools.
Why Cross Compiling ?
You might ask, why cross compiling, why can’t I install QT creator directly on Pi and write and compile my code on it. Good question. Here are my answers:
1. You can easily do sudo apt-get install qtcreator. But you end up developing in QT4. There is no QT5 for Pi. Trust me you don’t want to limit yourself to QT4.
2. Raspberry Pi is a slow machine relatively. A simple build and run might takes a long time if you develop in pi itself.
3. Your embedded device might not have head (display) or any input method. You might be developing a linux for your fridge !
let’s get started.
I spent a lot of time and gone through a lot of tutorials to get this done. All tutorial that I went with were missing something. Either a download link was missing or broken, or I had no clue what output you expect to see after each step. So I ended up doing steps over and over without knowing what step I did wrong. Also there were no troubleshooting steps. The major tutorial that I followed was this one. Thanks to the author. 🙏
So in my tutorial, I make sure all the download links to the toolchains and patches are working. I should you either a picture video of the output you should expect from every step and I try include some of the output that you should NOT get and tell what to do in case you get it. If any of the download links doesn’t work, please hit me up.
Alright. Let’s begin:
What do I need to begin:
1. A linux machine with Ubuntu already installed. I haven’t tried it on other distributions, it might work.
2. Internet connection
3. Raspberry Pi 3 preferably. This works on Raspberry pi 2 as well. With SD card.
4. Ethernet Cable.
What you end of having :
- A customized Raspberry Pi image with all the QT libraries that will be burnt on a micro SD card and Pi will boot with this.
- Qt5Pi version on your linux.
- arm toolchain in your linux.
Note: This process takes 2–3 hours at least to setup if this is your first time. And another 1–2 hours for your linux to make things ready. Spare 4–5 hours, grab a cup of coffee and let’s begin. 😈
Step 1: Install a fresh copy of Ubuntu on Non Apple machine.
Question: Can I use parallel to install Ubunto on my Mac and cross compile? How about bootcamp ?
Answer: I tried parallel many times. I couldn’t. I never tried Ubunto with bootcamp. It might work. You try and let me know.
Download Ubuntu image from here and burn it on a USB drive. If you don’t know how, here is how you do it on Mac
1. Open up terminal.
2. Type
diskutil list
Then the terminal shows you a list of all the devices that are connected to your mac. Try to identify your USB drive. It should show as disk3 or disk3s1. Try uplugging your USB drive and doing a diskutil list. Then plug the USB and do a diskutil to see what device is added to your Mac.
3. Unmount the USB drive by :
diskutil unmountDisk /dev/disk4
You should use your own disk numver instead of disk4.
4. Burn the image to the Disk. In terminal CD into the folder than contains the image and do :
sudo dd bs=1m if=image.img of=/dev/rdisk4
Again, you should put your own disk# instead of disk4.
Don’t copy and paste mine please :)At this point, the terminal should seem freezing and doing nothing until the burning process is done. You can track the progress by clicking CTRL + T. If it doesn’t seem frozen and gives any other message immediately, you did something wrong. Go back and do this step again. Once the burning is done. Take the USB drive, plug it into to the computer you intend to use for cross compiling. Reboot the machine, go to boot sequence, boot from the flash memory and install a fresh copy of Ubunto.
Step 2: Installing QT Creator on your Linux.
Now are we are going to install QT creator on our Ubuntu. Go to the QT creator website and download the installer. You can download the QT Creator Open Source if you are not doing any commercial development on QT.
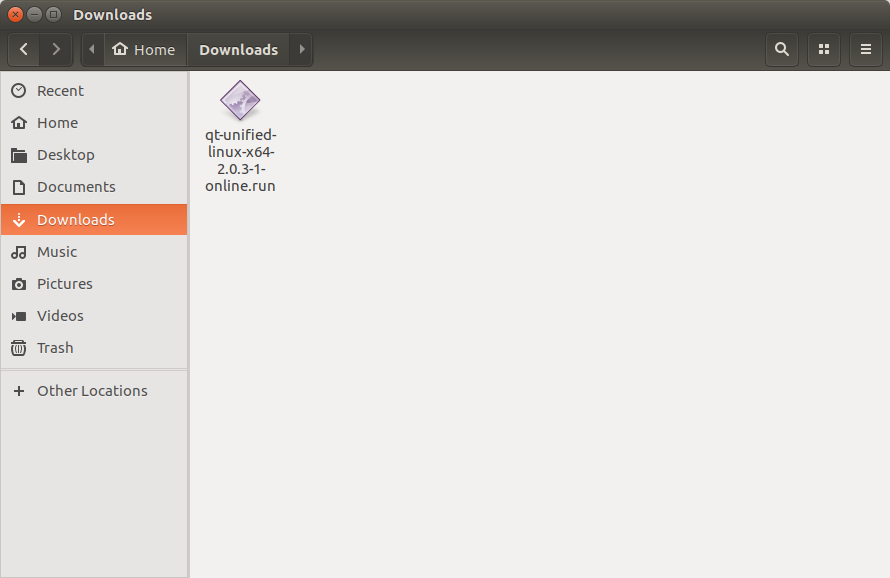
Download then installer. You should have a file like this in your download folder:
Open up the terminal,
CD into the Download folder.
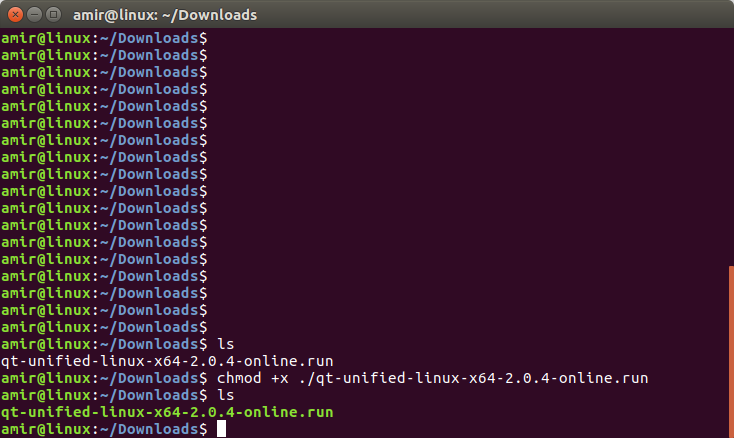
In order to run the installer, you have use the “Chmod” command to change the permission and run it. Read more about linux permissions from here.
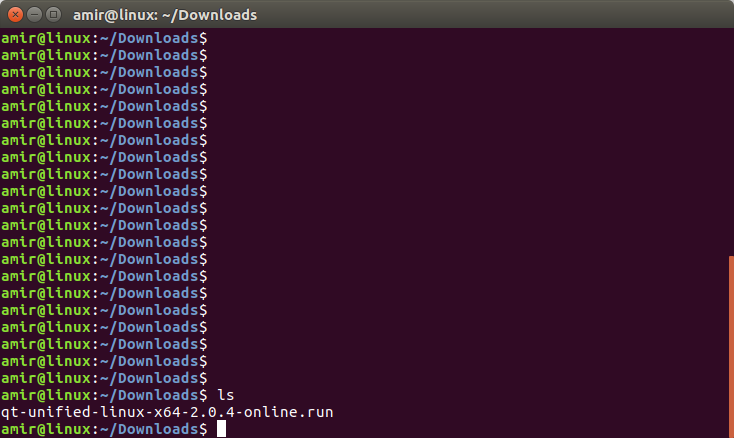
If you list the items in the download folder by:
ls
you will see that the installer that you downloaded is white and after changing the permission with chmod, the installer is green.
before:
After
Then:
chmod +x ./qt-unified-linux-x64–2.0.4-online.run
now run the installer by:
./qt-unified-linux-x64–2.0.4-online.run
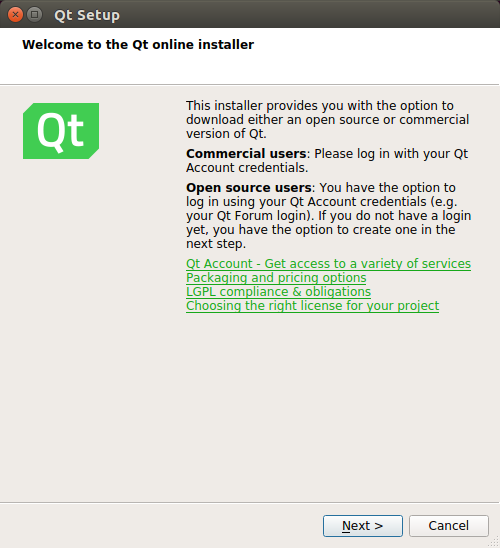
Now the installer opens up. Proceed to installing the QT creator. At the time of this tutorial, QT 5.7 is out there. When I did the cross compiling, I used 5.4. Later I tried to prepare another cross compiling machine and I used 5.6 I ended up missing some of the major QT sources so I had to go back and do it with 5.4. So I’m using 5.4 to prepare the cross compiler. Once the cross compiler is ready, you can develop your code in the latest QT version. So proceed with 5.4 and don’t worry about developing later.
Make sure that the source components are installed.
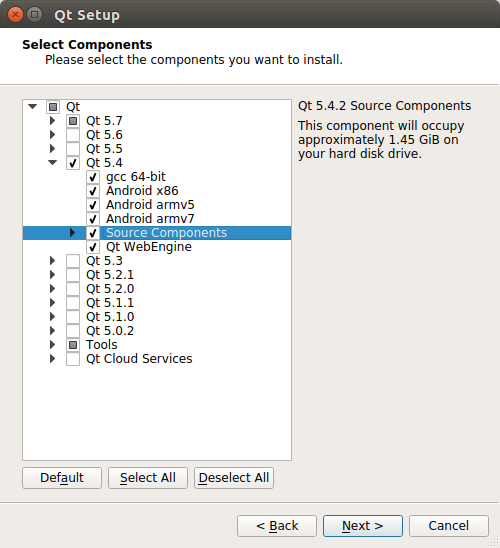
Go ahead and finish the installation.
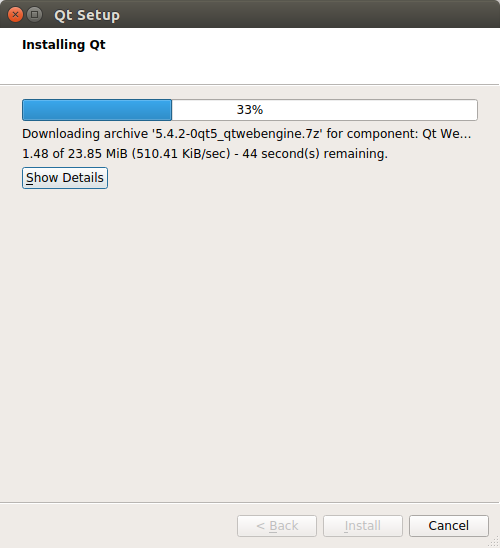
When the installation is finished, open the QT Creator. We need to make sure that the compiler is already set. Make a new QWidget project. Run it and make sure it works. It should be like this:
PHOTO NEEDED
Most likely, you are missing the compiler and you need install the compilers and dependencies and you got a compiler error as below:
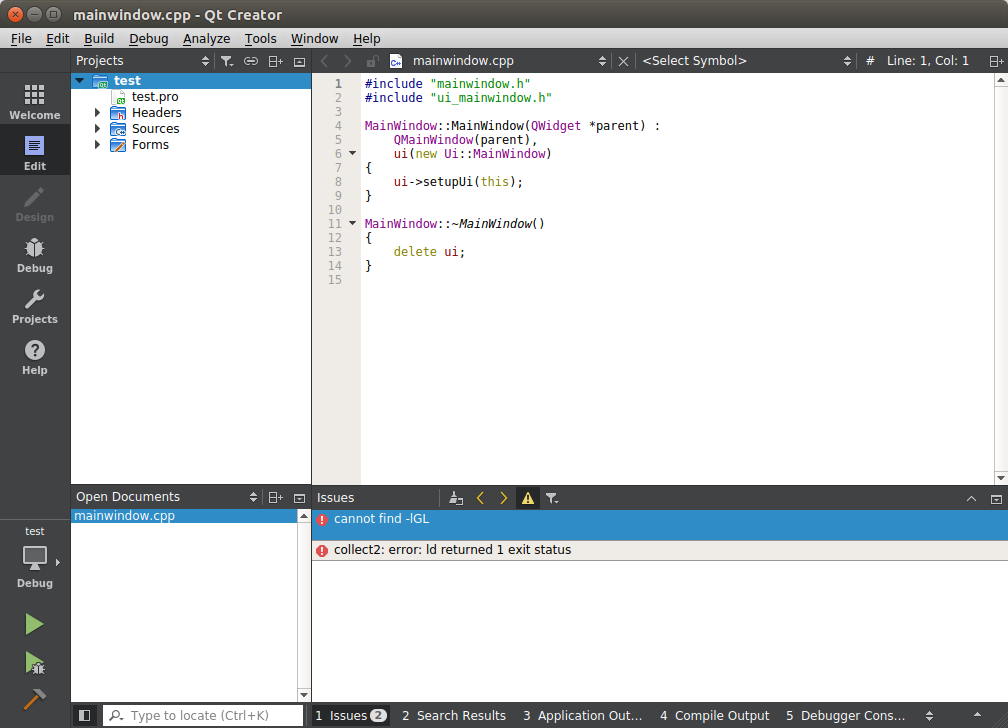
I followed the instructions here. If you don’t feel like opening the page and reading through, install all the below packages without asking why ;)
If you don’t know how to paste in the terminal, use “shift + Ctrl + V”
sudo apt-get upgrade
sudo apt-get update
sudo apt-get install libgl1-mesa-dev
up to here should be fine. If you got more errors, keep going:
sudo apt-get build-dep qt5-default
sudo apt-get install libxcb-xinerama0-dev
sudo apt-add-repository ppa:u-szeged/sedkit
sudo apt-get update
sudo apt-get install sedkit-env-qtwebkit
sudo apt-get install build-essential perl python git
sudo apt-get install “^libxcb.*” libx11-xcb-dev libglu1-mesa-dev libxrender-dev libxi-dev
sudo apt-get install flex bison gperf libicu-dev libxslt-dev ruby
sudo apt-get install libssl-dev libxcursor-dev libxcomposite-dev libxdamage-dev libxrandr-dev libfontconfig1-dev libcap-dev libxtst-dev libpulse-dev libudev-dev libpci-dev libnss3-dev libasound2-dev libxss-dev libegl1-mesa-dev gperf bison
sudo apt-get install libbz2-dev libgcrypt11-dev libdrm-dev libcups2-dev libatkmm-1.6-dev
sudo apt-get install libasound2-dev libgstreamer0.10-dev libgstreamer-plugins-base0.10-dev
Noobie note 1: Do not copy and paste all the above commands all together in terminal. Those are separate commands. Every line that has sudo is a new command line.
Alright. I know you couldn’t resist asking questions. So let’s answer them. 😏
Q: Do I need all of these packages and dependencies?
A: Short answer Yes and No. Long answer: You don’t need all of them now. But you will need some of them later. It wont hurt installing them.
Q: Some of them didn’t go through.
A: I know. That’s fine. If we face issues later, we will deal with it.
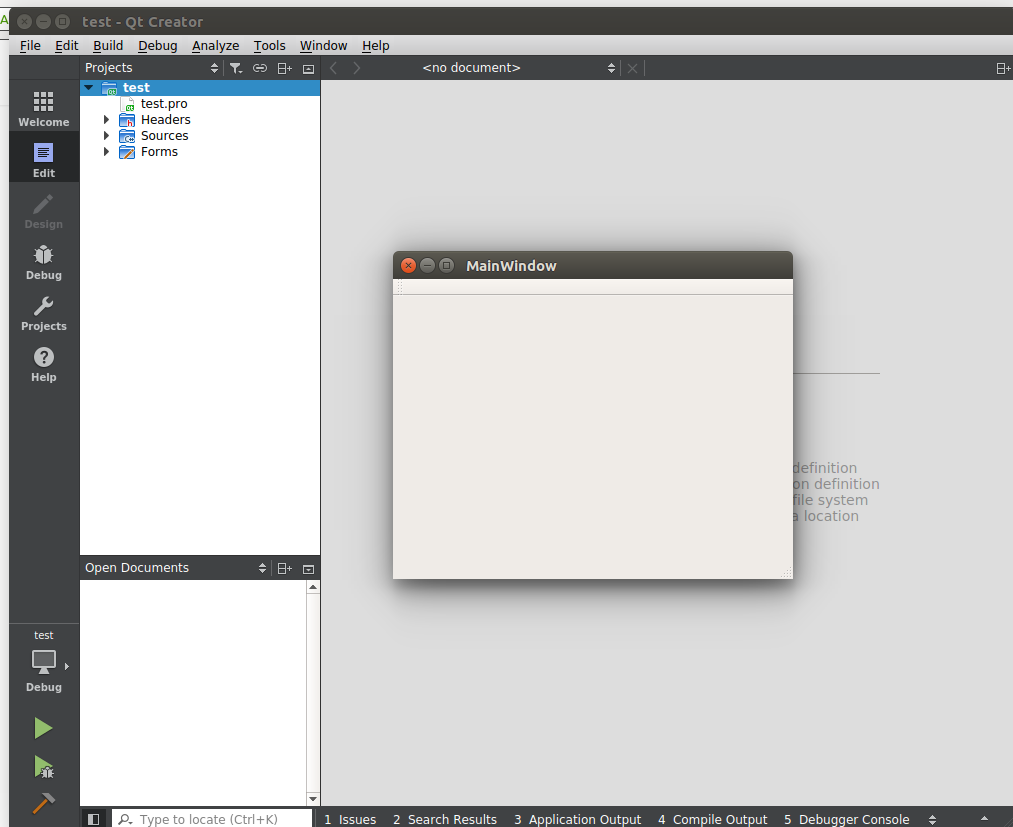
When all the installations are done, open up the QT creator again and do a test QWidget app. Build and run. You should get the following result for example
Step 3: Setting up the the toolchain and making the image ready.
Open up the terminal if it’s not and make a folder and name it whatever you feel like. You can use my folder name if you are not creative 😜
mkdir ~/crosscompile-tools
cd ~/crosscompile-tools
git clone https://github.com/raspberrypi/tools.git
or if it didn’t work
git clone https://github.com/amirhma/rpitools.git
Cd tools
Read noobie note 1 one more time if you are a noob.
Do a “ls“ to see the content. It should look like this:
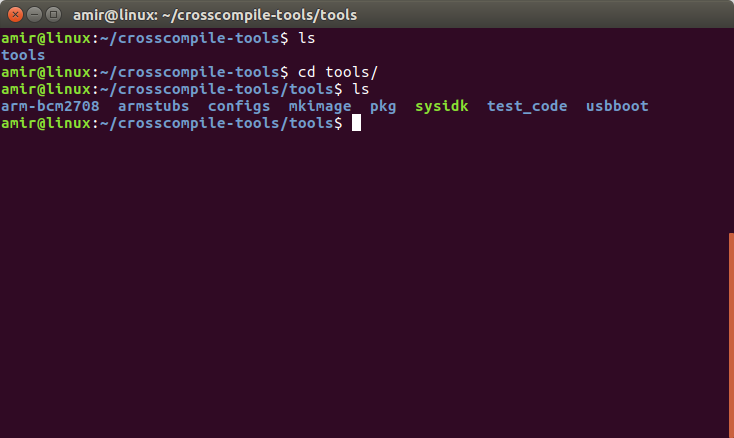
The “arm-bcm2708" folder contains the magic. If you are missing any of the items, redo this step.
Now we need to get some tools that help us making the process easier.
wget https://raw.githubusercontent.com/riscv/riscv-poky/master/scripts/sysroot-relativelinks.py
chmod +x sysroot-relativelinks.py./sysroot-relativelinks.py
cd cross-compile-tools
If you are running on Linux 64bit, install the following package:
sudo apt-get install lib32z1
There is only one more download left before we start the setup and build process:
Download the latest version Raspbian Jessie from here. Unzip it first, rename to raspbian.img and move it it to the your crosscompile-tools directory.
https://www.raspberrypi.org/downloads/raspbian/
Question: Can I download the Lite version ?
Answer: I haven’t tried. Please try it and let me know.
The next step is to mount the Raspbian image on your linux. The destination that we are mounting is :
/mnt/rasp-pi-rootfs
/mnt/ exists but not the rasp-pi-rootfs . So let’s create it:
sudo mkdir /mnt/rasp-pi-rootfs
Please go to the /mnt/ folder and check to see if the folder is created.
The next step gave me some trouble when I was doing it for the first time. So I explain this step a little in detail. The major tutorial is included here. What you need is here:
In terminal , cd into the crosscompile-tools and do the followings:
fdisk -l raspbian.img
You should get the following result:
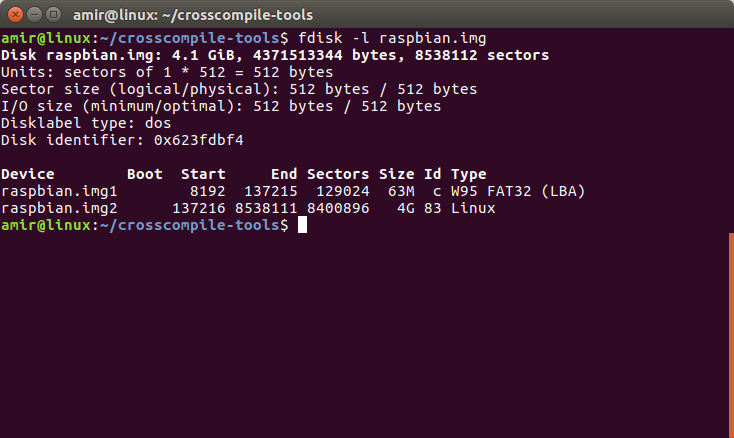
As you see it shows two images,. What we would like to mount is the raspbian.img2. Important information to take note are :
Sector size: 512 bytes
Start block for img2: 137216
Note: Don’t use my sector size and start block numbers as yours might be different.
Now we mount it using the following generic command:
sudo mount raspbian.img -o loop,offset=$(( Sector size * Start block for img2)) Destination
So for me it looks like this:
sudo mount raspbian.img -o loop,offset=$(( 512 * 137216)) /mnt/rasp-pi-rootfs/
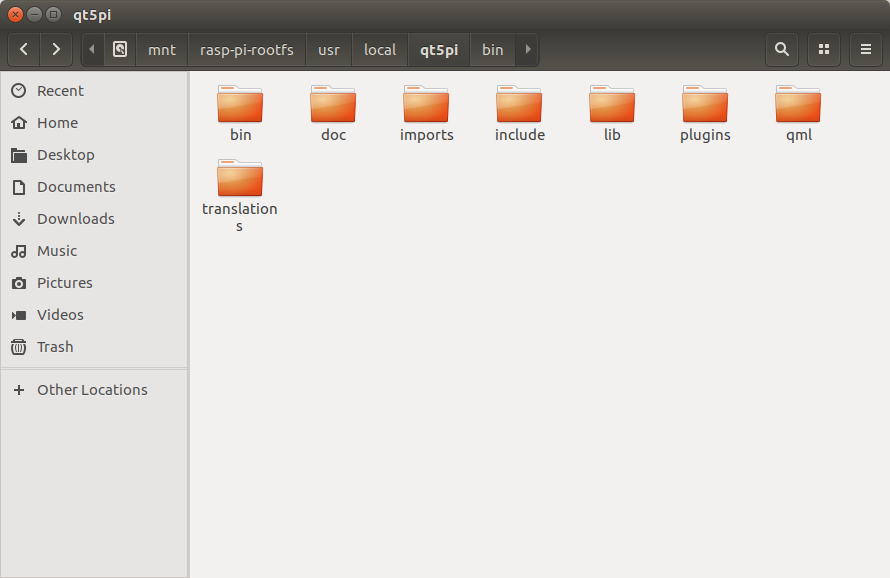
Go manually to the /mnt/rasp-pi-rootfs folder and make sure you see stuff like the following image:
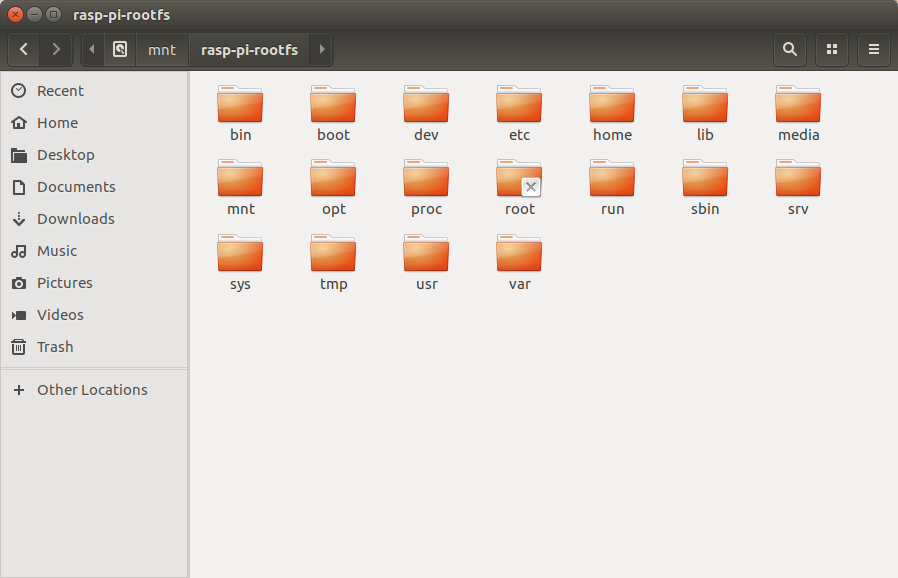
If your /mnt/rasp-pi-rootfs doesn’t look like mine, you did something wrong. Go back and do the step again.
Alright. We have come a long way for setting up. We are pretty much midway though. Let’s do the actual work now.
Setting Up and Building
We are going to fix all of the symbolic links in the Pi’s root file system.
In terminal, make sure you are in the crosscompile-tools folder. You can alway use “pwd” command to check where you are. We are going to adjust symlinks to be relative and fix broken symbolic links.
sudo ./sysroot-relativelinks.py /mnt/rasp-pi-rootfs
A successful results should takes a few seconds and turn a few pages of the terminal.
Initially I used the following script to fix the symbols.
./fixQualifiedLibraryPaths /mnt/rasp-pi-rootfs ~/crosscompile-tools/tools/arm-bcm2708/gcc-linaro-arm-linux-gnueabihf-raspbian-x64/bin/arm-linux-gnueabihf-gcc
I got an output that looked like the below:
Photo NEEDED
So if searching the term “ XX” and looking for a solution to this output brought you to this pages, try the new scrip that I just included.
One last step before the main build. Let’s export some variables to make our lives easier and save us some writing:
export RPI_SYSROOT=/mnt/rasp-pi-rootfs
export RPI_TOOLCHAIN=~/crosscompile-tools/tools/arm-bcm2708/gcc-linaro-arm-linux-gnueabihf-raspbian-x64/bin/arm-linux-gnueabihf-
If you are running on Ubunto 32bit, this is your export:
export RPI_SYSROOT=/mnt/rasp-pi-rootfs
export RPI_TOOLCHAIN=~/crosscompile-tools/tools/arm-bcm2708/gcc-linaro-arm-linux-gnueabihf-raspbian/bin/arm-linux-gnueabihf-
Cd into the Qt folder.
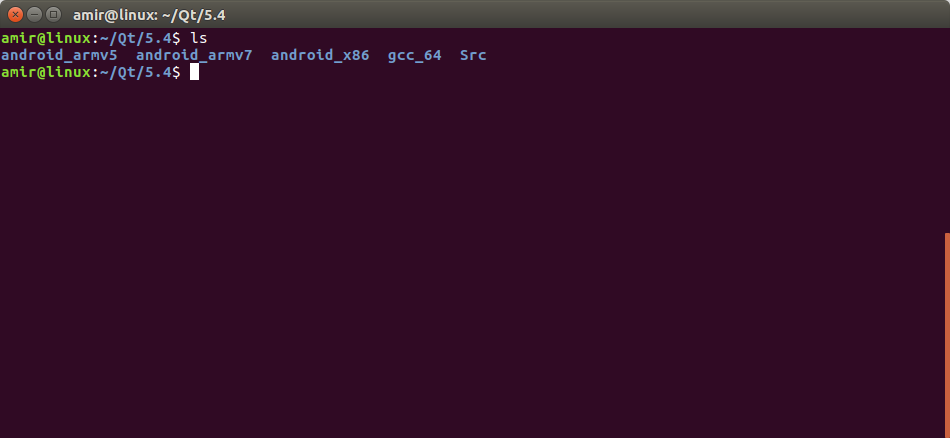
cd ~/QT/
ls
cd 5.4
If you have other version of the qt, make sure it contains the Src folder. Otherwise go back to the QT installation and choose the source components and install it again.
cd Src
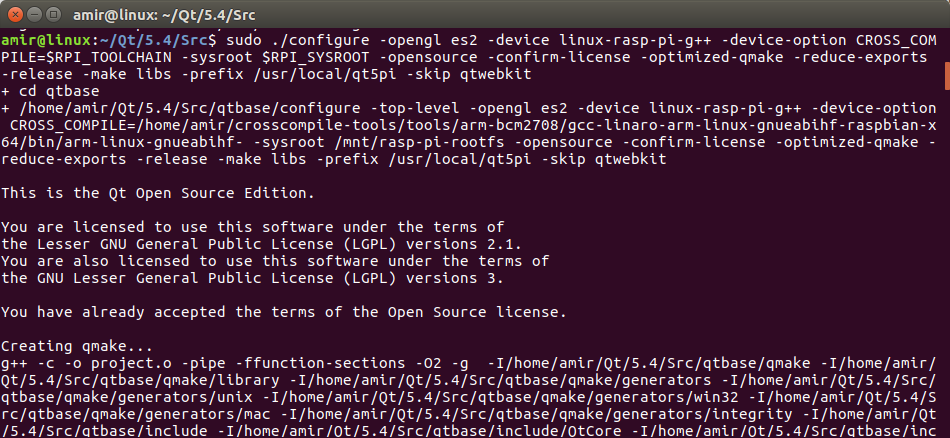
now let’s build it by :
./configure -opengl es2 -device linux-rasp-pi-g++ -device-option CROSS_COMPILE=$RPI_TOOLCHAIN -sysroot $RPI_SYSROOT -opensource -confirm-license -optimized-qmake -reduce-exports -release -make libs -prefix /usr/local/qt5pi -skip qtwebkit
After typing the above command, the terminal will go crazy and output the following stuff . It also takes a 4- 5 minutes depending your computer. If you it finishes so fast for you 10–15 seconds, you are doing something wrong. Read the error and try to fix. You might have made a mistake giving the right folder names while doing the exports. Read the errors carefully
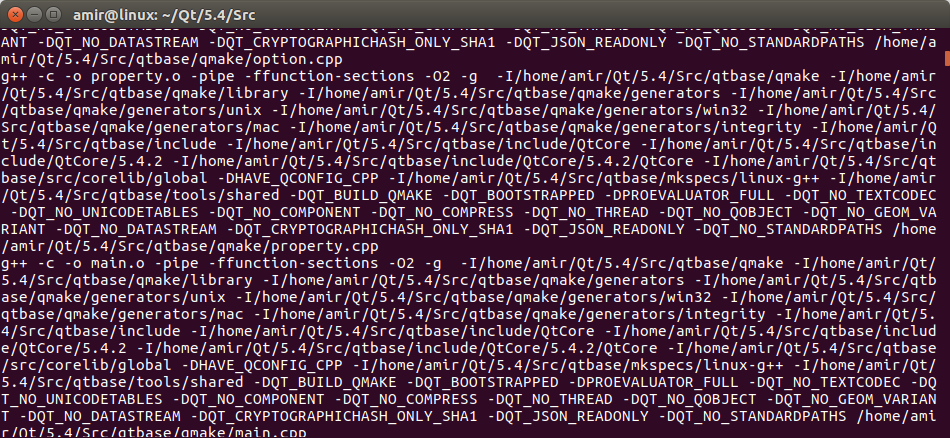
and it should finishes like this:
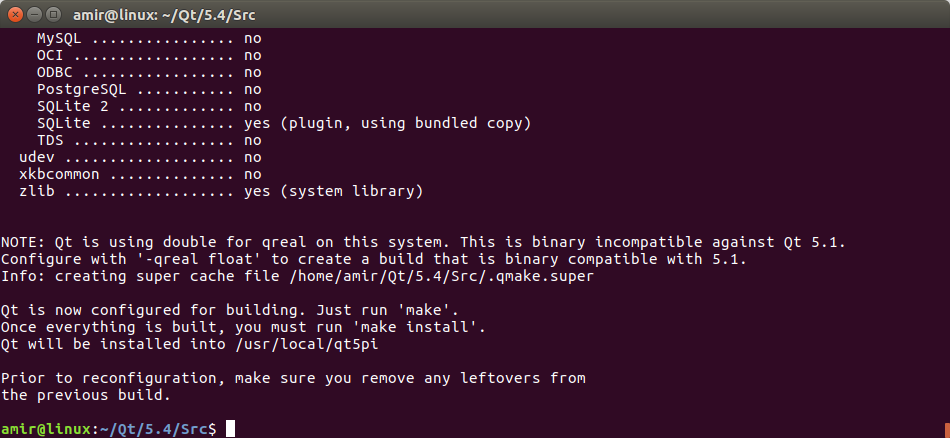
If you see something different, go back do the above steps until you get a similar output.
Now do:
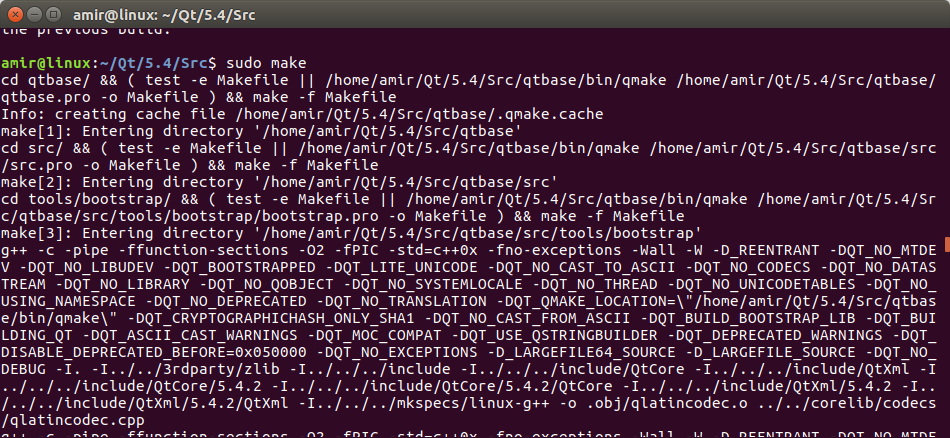
sudo make
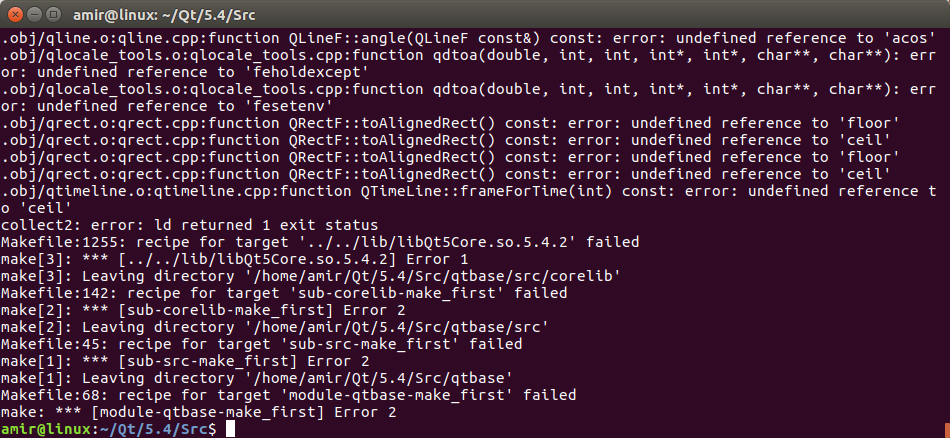
The terminal goes crazy again and output stuff like below. The process also takes a long time. 30–45 minutes at least. If yours finishes fast, something has gone wrong. Read the errors and try to troubleshoot.
Successful Output:
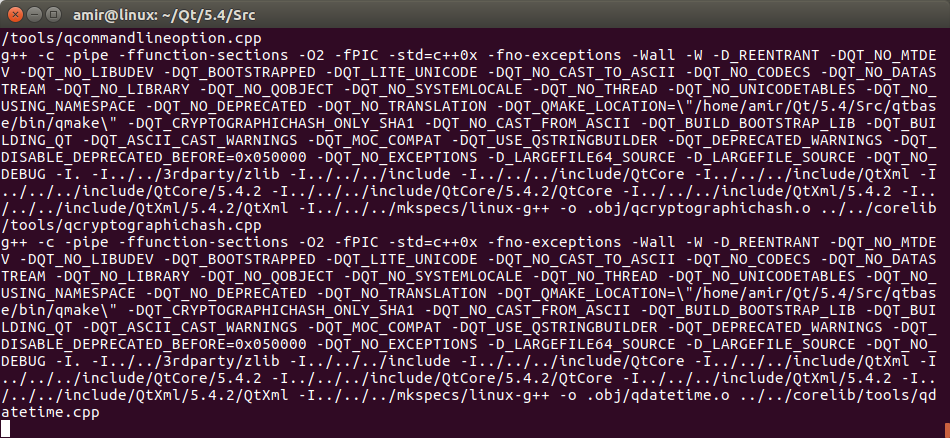
during the process:
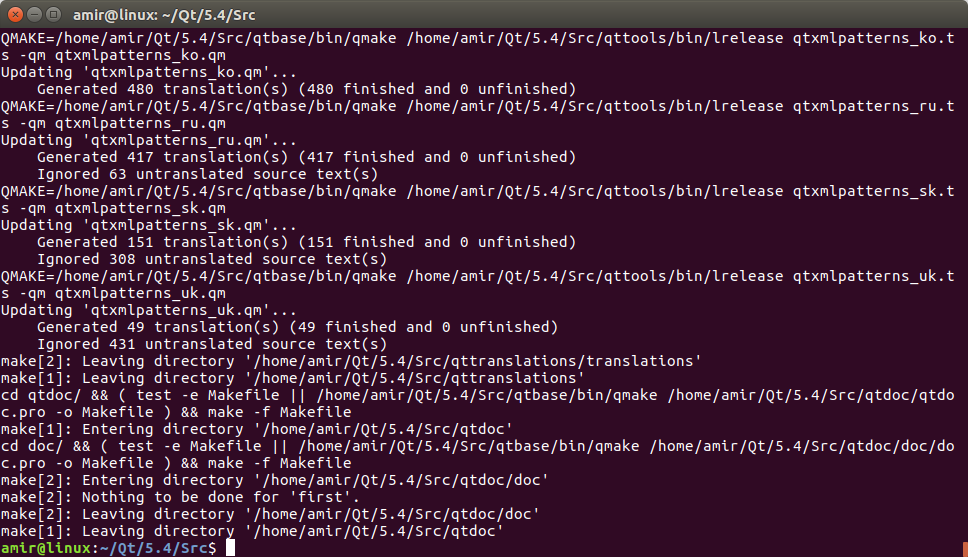
final outputs:
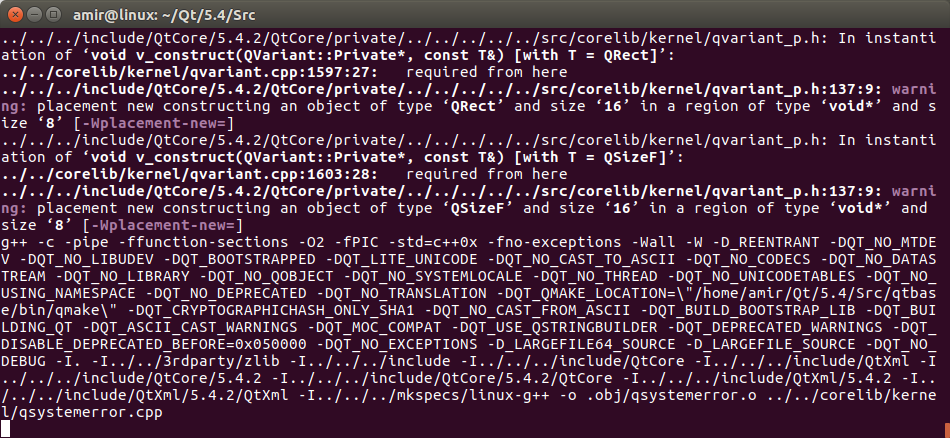
There should be NO error at all.
This is how an error page would look like that happened to me the while I was doing it and it turned out I didn’t adjust symlinks to be relative properly. Go back the previous steps and do it again.
then we do :
sudo make install
This steps also takes couple of minutes and a successful output looks like this:
Again the terminal goes crazy and finishes like this:
Almost done, let’s check two places to make sure things went well.
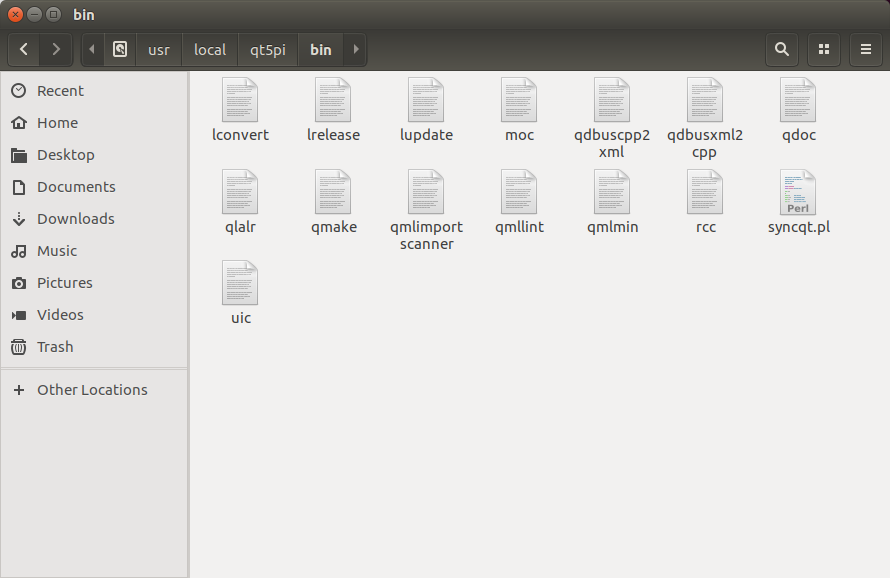
- Go to the folder /usr/local/qt5pi/bin, you should see the following contents:
2. Go to /mnt/rasp-pi-rootfs/usr/local/qt5pi, you should see the following contents:
If you made it to this point and you got the results that I got, GOOD JOB !. It took me a few weeks to get it to work the first time I tried it.
We are almost done. The next few steps teaches you how to setup Qt Creator to cross compile. In other words, how to write code in QT Creator and see the results on Pi.
At this point, you should have 3 things.
- One modified image of that will eventually be burnt on a SD card and goes to the Raspberry Pi that is located at ~/crosscompile-tools
- A qt5pi folder located at /usr/local/qt5pi folder.
- The toolchains located at ~/crosscompile-tools/tools
If you have all the above, let’s move forward by burning the raspbian.img file that you modified into a microSD card too boot your device to. Follow the instructions of burning the SD card at the beginning or follow the instructions here to burn it into the SD card.
Setting Up Qt Creator
We are going to setup the QT creator and start developing program.
Make sure the following items are taken care of before proceeding:
- The custom image is burnt into the MicroSD card and placed into the Pi.
- Your Pi 3 is connected to Internet using an Ethernet cable.
- The raspbian.img is mounted on your linux computer already.
I ephasize you need that custom image of yours both burnt and installed on the Pi and already mounted on your cross compiler Linux. If you don’t know how to mount the image, scroll up and find the instruction.
Open up the Qt Creator and go to the to
Tools > Options > Build and Run
then go to the Compiler tab
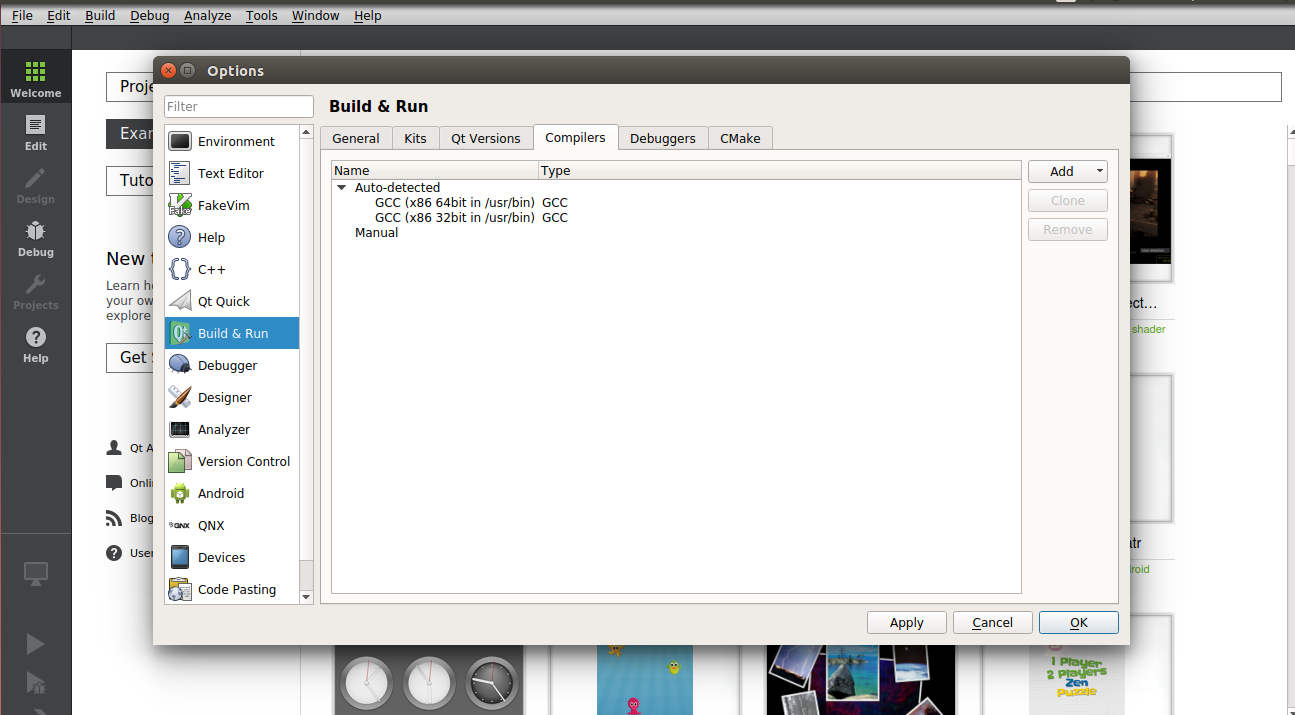
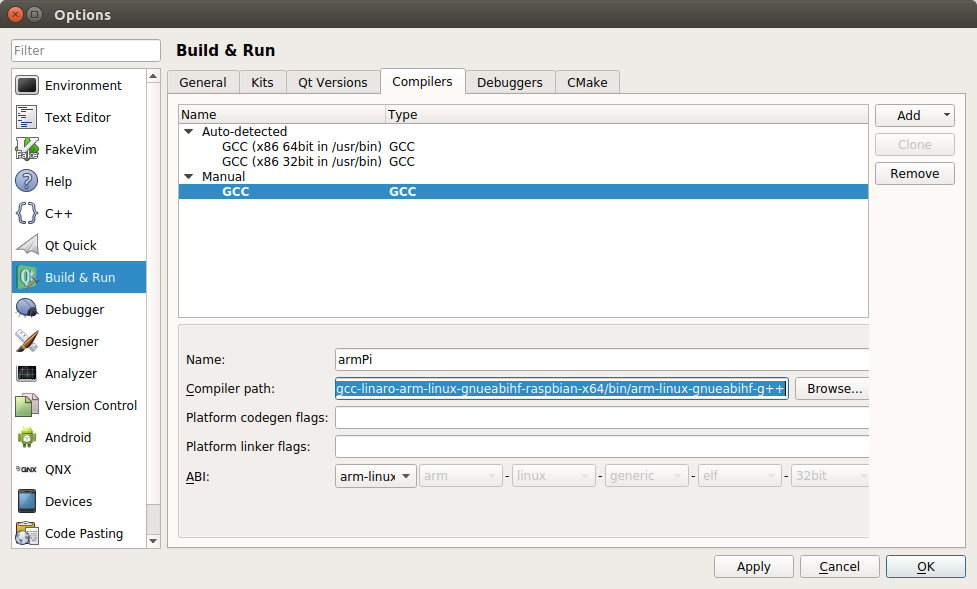
go to Add>GCC
rename the compiler to armPi
Brows in the compiler path and choose:
~/crosscompile-tools/tools/arm-bcm2708/gcc-linaro-arm-linux-gnueabihf-raspbian-x64/bin/arm-linux-gnueabihf-g++
If you are running on a 32bit Linux, choose the
~/crosscompile-tools/tools/arm-bcm2708/gcc-linaro-arm-linux-gnueabihf-raspbian/bin/arm-linux-gnueabihf-g++
Then go to Qt versions tab, click on Add and brows into
/usr/local/qt5pi/bin
and choose the qmake file. If you don’t see the qmake, then do the steps from the beginning, your build and setup didn’t go well.
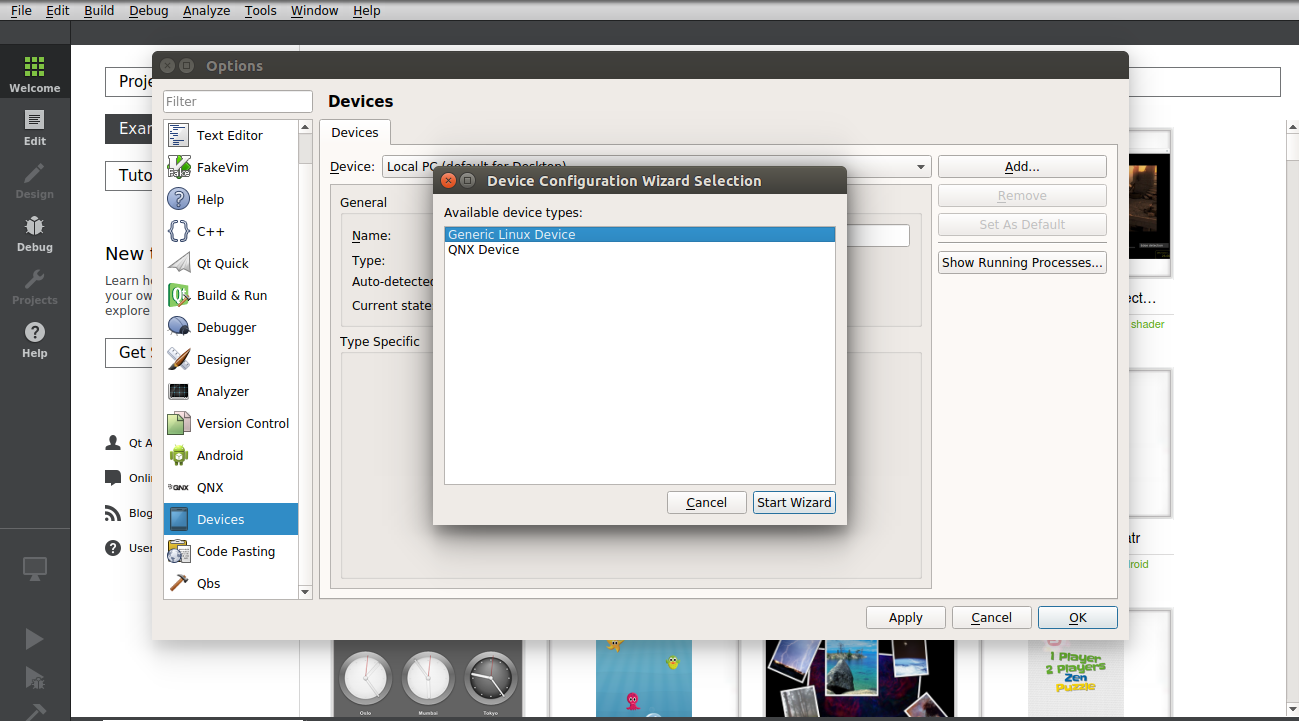
Now we need to configure out Raspberry pi device that is already booted by our custom image and connected to the local network using the Ethernet cable
Then go from the left column, choose Device , click on Add and choose Generic Linux Device and click on Start Wizard:
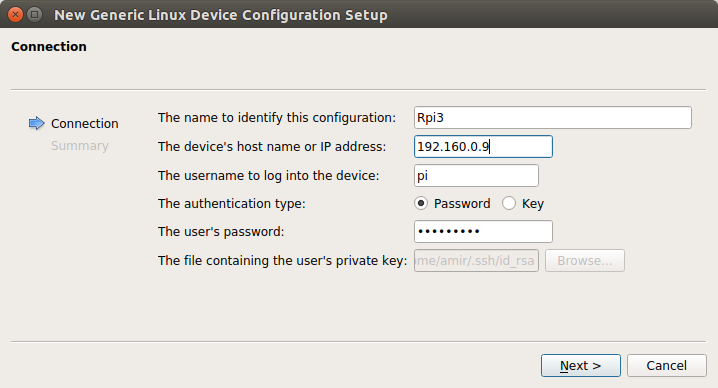
Name your Device , enter the IP of your Pi, for
user-name : pi
password: raspberry
If you don’t know how to find the IP address of your Pi, read here. Or use :
sudo arp -a
to list all the devices connected to your network and guess which one is the Pi by trial and error. Keep changing the IP in the test wizard until you get the success message.
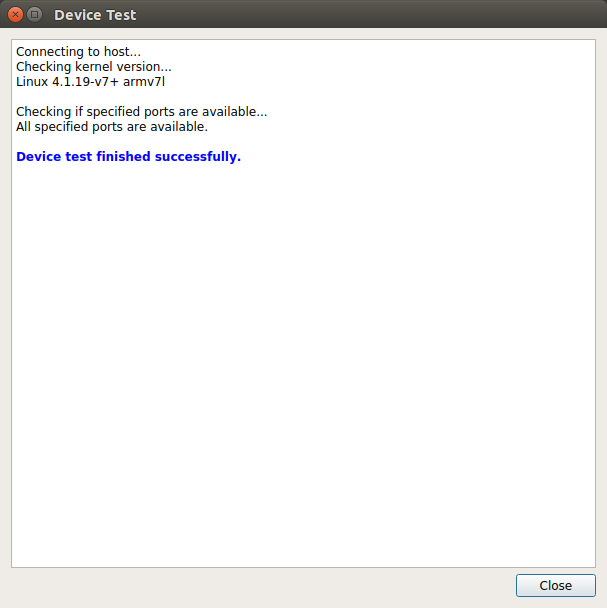
Click on Next and then Finish. Make sure you get a connection successful message as below:
Now move to the Build &Run, go to Kits and click on Add:
Name your Kit whatever you like, then change the device type to Generic Linux Device, then choose the device you created. In my case it’s Rpi3.
For the Compiler, choose armPi and for the Qt Version choose the Qt5Pi that you added earlier.
Please make sure there is not flag or error in front of the kit you created.
Then start a new project can call it testPi. for the Kit selection, make sure the Raspberry Pi 3 kit that you chose is already selected. Click on next and finish.
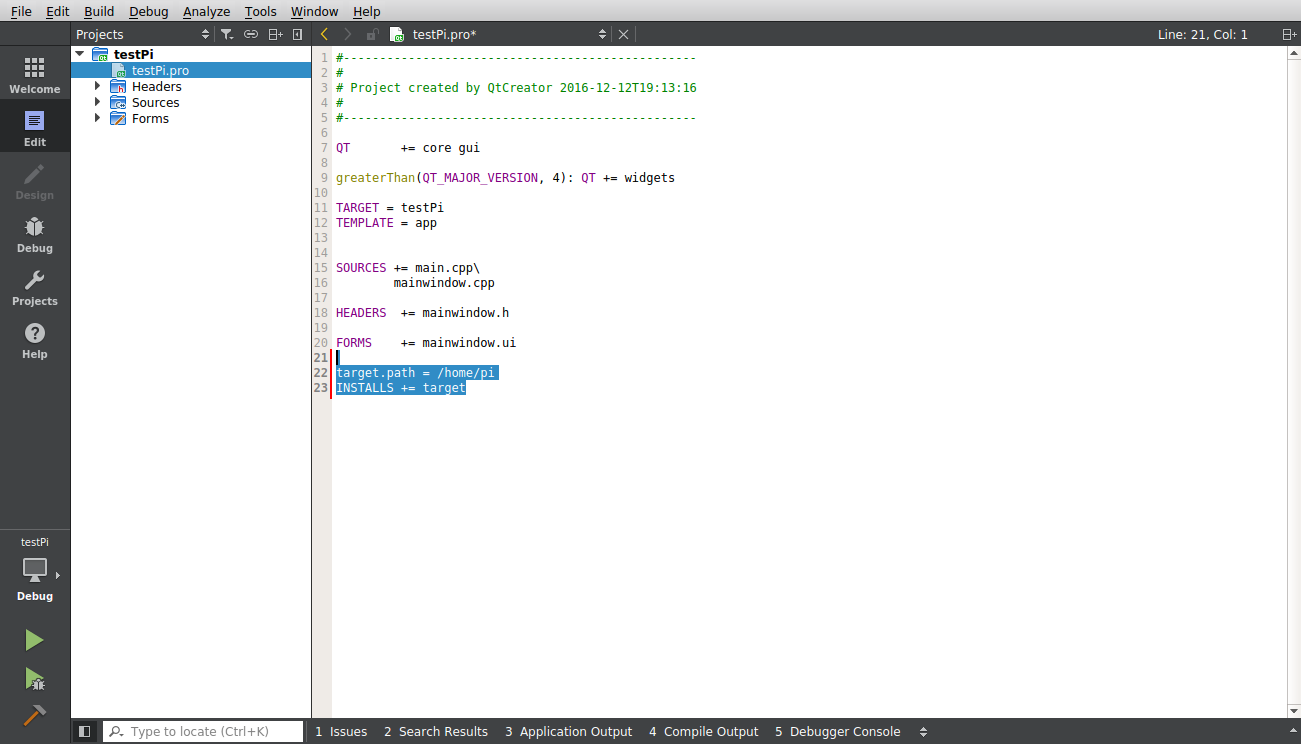
Then go to the .pro file and add the following lines at the end
target.path = /home/pi
INSTALLS += target
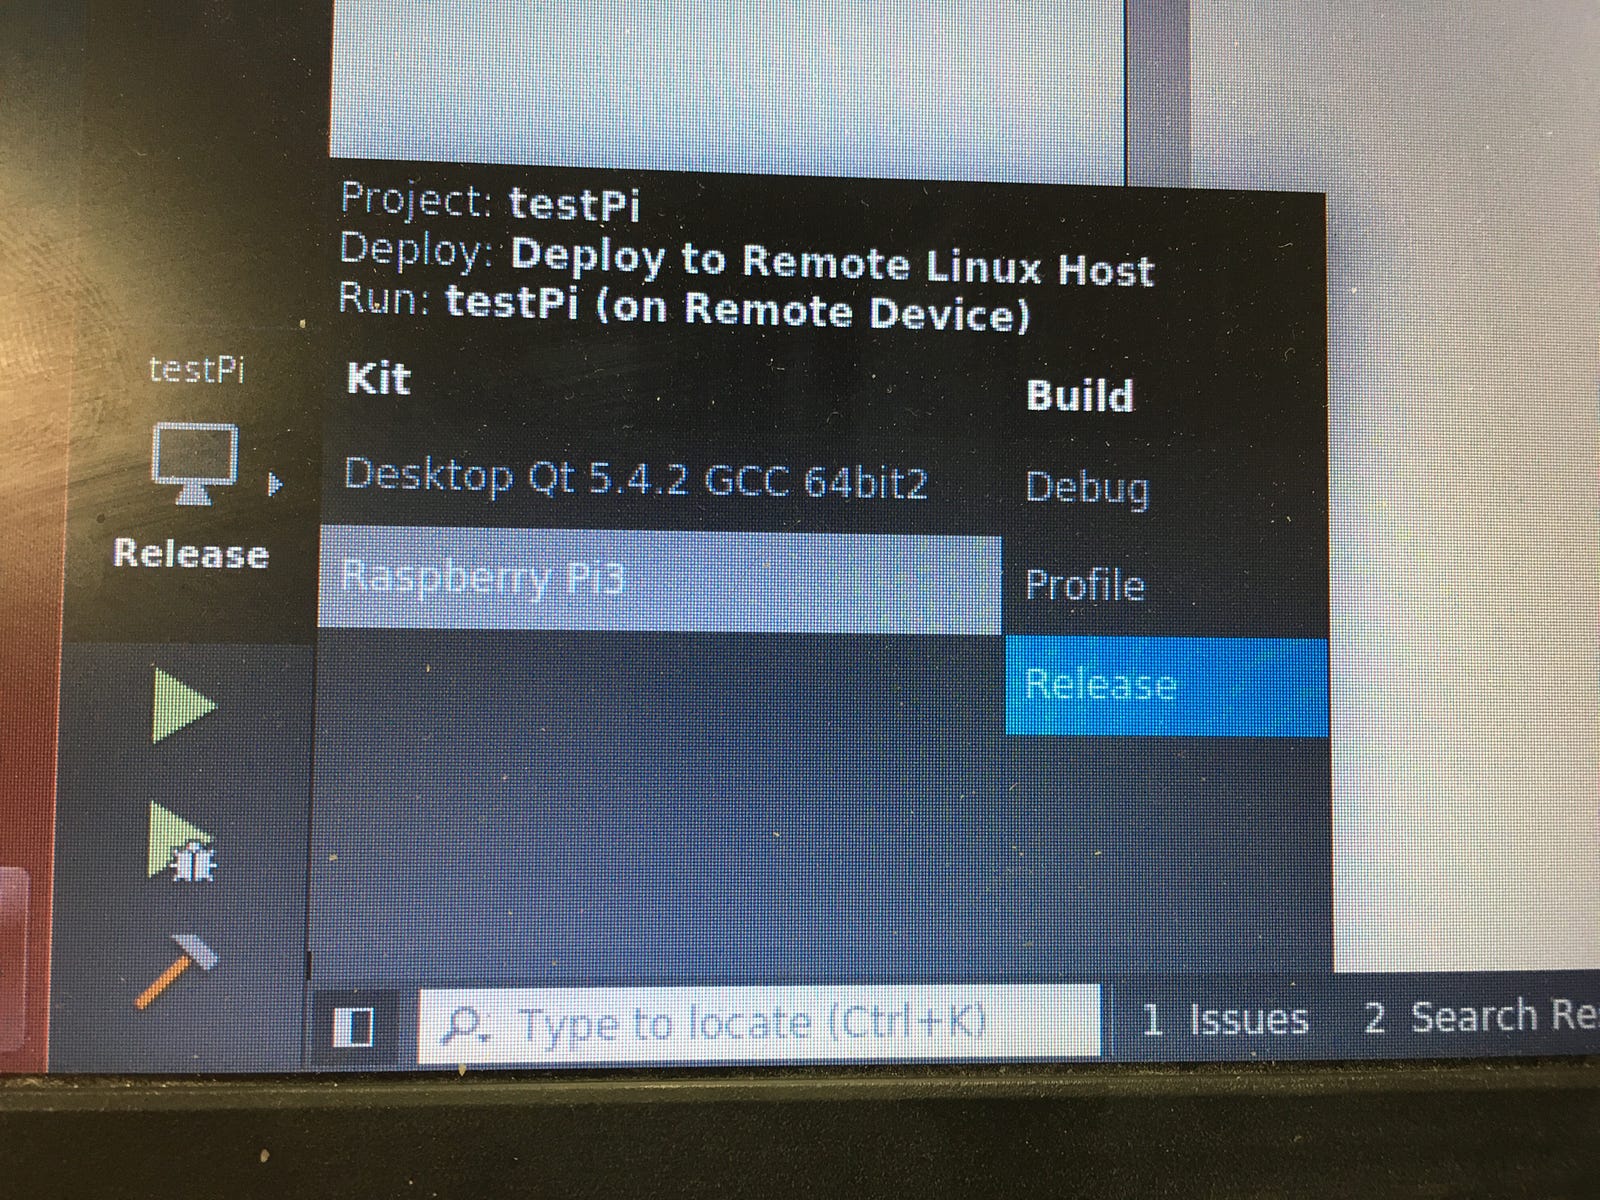
then go to the release, choose Raspberry Pi 3 kit and then click on Release and Done. The program is compiled and is placed on your Pi through network.
Connect your Pi to a monitor, and check if you see it . Your compiler output should look like this :
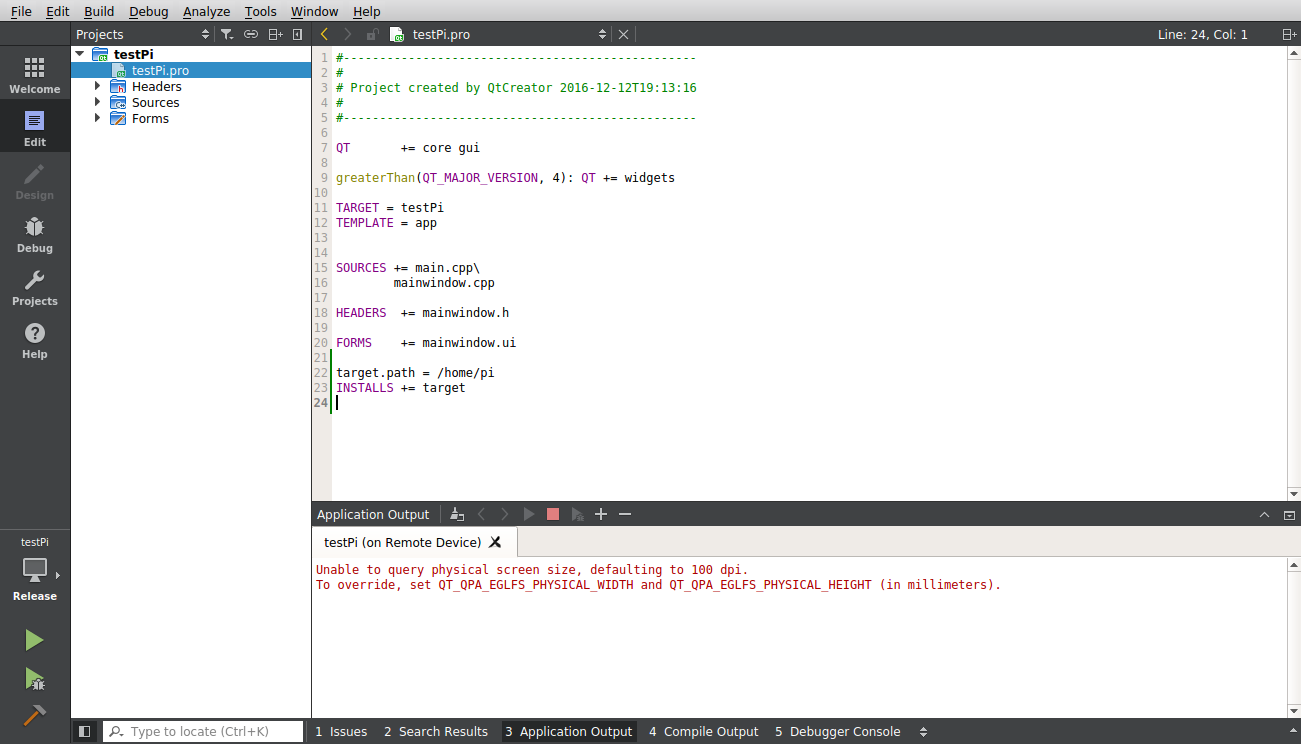
Whatever qDebug(); you place in your code will show up in your Qt Creator Application Output.
You are Done.
Happy cross compiling on your Pi.
Start changing the world by developing cool embedded devices.
If you face issues while the process, leave me your questions in the comment section, I would be happy to help.
'Linux' 카테고리의 다른 글
| 라즈베리파이4에서 OpenCV 빌드하기 (0) | 2020.03.31 |
|---|---|
| GCC 컴파일 옵션 알아보기 (0) | 2020.03.30 |
| Makefile : Clock skew detected (0) | 2018.08.23 |
| OpenCV cross compile for arm linux (0) | 2018.02.23 |
| TFTP 설정 (0) | 2017.07.20 |